Hello and welcome to my Blog. Here I will be posting many different things to record my progress towards becoming a Game Artist, which will include projects for school and personal work as well. Currently I am attending the Art Institute of California - San Diego for Game Art and Design and I am just over half way finished with my first quarter. I am looking forward to sharing my work and receiving feedback from you. Thank you.
Thursday, October 30, 2014
Mech Arm - Switching Gears
I've been doing a lot of historical props lately and I thought I would change things up by doing a gritty futuristic mech gattling gun arm. Almost finished with the high poly. I plan to do the surface detail on the outside armor in DDO so my biggest challenge here is figuring out how the internals in the bicep should look.
Friday, October 24, 2014
Roman Armor - Companion to the Sword
It's the final countdown and I'm ramping things up for a final push. I've been working on a couple things here and there. One of which is this suite of armor. It was modeled in Blender and Textured in Photoshop and Quixel. It's almost done and this is the second iteration of it based on feedback.
Wednesday, September 24, 2014
Monday, September 22, 2014
Gladius - Scabbard in Engine
I was hoping to be further on this but I'm hitting a snag with a technical issue on the mask. I think I'll have it figured out soon but just thought I would update with the scabbards high poly and low poly is done with the bakes finished and in engine. One I fix my issue and dial in the materials this asset will be done and ready to show Wednesday,
Saturday, September 20, 2014
Gladius - Started Scabbered High Poly
Hey everyone, just a quick update here. I started doing the high poly of the scabbard and sculpted in some details. I'm going to use the same materials already created in engine for the sword so once I get to the point of baking high poly down to low poly it should be all down hill from there.
Wednesday, September 17, 2014
Siege Tower - Building Materials In Unreal 4
I've been working on building the materials for the tower out in a single texture in Marmoset but I've now backtracked a bit to set things up in Unreal 4. The advantages are that I can build a more robust material network in Unreal and its already in game. These were all taken in Unreal 4.
Gladius - Material Creation
The gladius is almost done. Here is a render of it in UE4. I'm using material layers. I think i might add a copper material to it, add a bit more grime and tighten up the blade design. The scabbard is next, but it will be using the same materials.
Wednesday, September 10, 2014
Siege Tower - Materials Begin
I am right at the start of working on the material maps for the tower. I still have more things I would like to go back and add to the geometry of the mesh, but a little bit of chaos never hurt anybody.
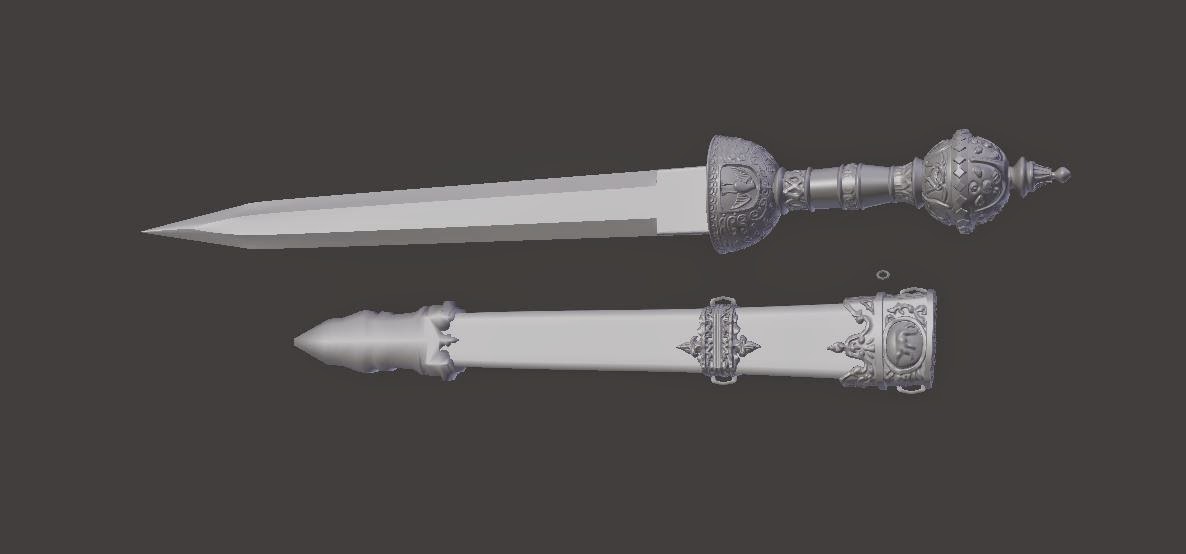
Gladius - HighPoly
I saw a gladius (ancient roman sword) replica being sold online and I really liked the hilt's design. I decided I would use it as a reference to make my own for a game model.
Doing a small prop here, but I will be doing the scabbard too. It's a start on the high poly sculpt and the low poly is almost ready.
Doing a small prop here, but I will be doing the scabbard too. It's a start on the high poly sculpt and the low poly is almost ready.
Tuesday, September 9, 2014
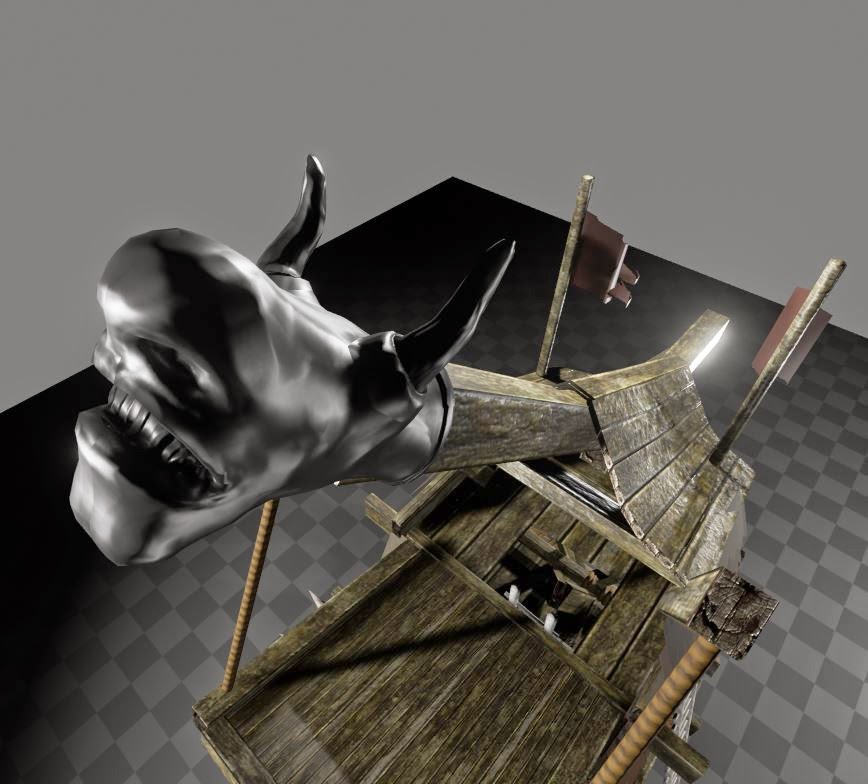
Siege Tower - Sculpting And Ropes
I've sculpted the head that goes on the top of the siege tower. I still need to bake it down. I've added in some smaller ropes to ties some of the boards together and added the symbols to the flags. Next I will be working on the wheels and finishing up the color texture so I can make the rest of the texture maps.
Saturday, September 6, 2014
Siege Tower - Alpha Fixed
I finally figured out how to resolve the issue I was having with the mesh being overall semi transparent when I assigned a transparency map. So to fix the issue I needed to assign a separate material to the objects that have transparency but this new one will have the transparency map as well. This keeps the majority of the model opaque and fixed the transparency artifacting .
Wednesday, September 3, 2014
Siege Tower - Block Out Finnished
Block out is done. I'm going to start working on the first pass on textures and then I will start doing some more detail modeling.
Friday, August 29, 2014
Siege Tower - Block In
I'm still working on blocking out the tower. The tower is designed with lost of details and it seems every board has a purpose. The interior isn't as well concepted out so I'm going to have to develope a lot of that myself. I'm predicting this step of the process will take some time, but since all the pieces are already UVed somewhat logically it will be a lot easier to texture.
Wednesday, August 27, 2014
5 Week Prop
We are working on this one for 5 weeks. It took me awhile to decide on what I wanted to do for a final prop since everything was open to us.
I finally decided on making this siege tower from Assassin's Creed. I didn't do this concept and all rights to it go to Ubisoft. I'm just using it as a reference to make a game prop for my portfolio.
I started by blocking out where my textures would go on a texture sheet for the prop. This is what I have. I'll fill in the space as I go if I find more props that need texturing.
The technique I'm using for this project, as far as planning out the textures first, is a technique that's used in environments frequently and I learned it from Digital Tutors. This is the specific tutorial http://www.digitaltutors.com/tutorial/857-Asset-Workflows-for-Modular-Level-Design
I finally decided on making this siege tower from Assassin's Creed. I didn't do this concept and all rights to it go to Ubisoft. I'm just using it as a reference to make a game prop for my portfolio.
I started by blocking out where my textures would go on a texture sheet for the prop. This is what I have. I'll fill in the space as I go if I find more props that need texturing.
I've blocked out the rough space it will take and now I'm starting to build the high poly.
The technique I'm using for this project, as far as planning out the textures first, is a technique that's used in environments frequently and I learned it from Digital Tutors. This is the specific tutorial http://www.digitaltutors.com/tutorial/857-Asset-Workflows-for-Modular-Level-Design
Wednesday, August 20, 2014
Portfolio Class - Dota 2 The Lunagia Blade - Day 5 - Turn In
All right, all done for now. The Lunagia Blade turned out to be 808 polygons. I went ahead and made all kinda of maps for it so I could plug it into lots of different rendering engines.
These are from Marmoset Toolbag 2.
These were done in UE4. The coloring is slightly different due to the lighting.
These final ones were done in Maya with a wireframe overlay comparison for the geometry.
Here is all the maps I generated.
These are from Marmoset Toolbag 2.
These were done in UE4. The coloring is slightly different due to the lighting.
These final ones were done in Maya with a wireframe overlay comparison for the geometry.
Here is all the maps I generated.
Albedo/Diffuse
Gloss
Ambient Occlusion
Metalness
Emmisive
Subscribe to:
Comments (Atom)


